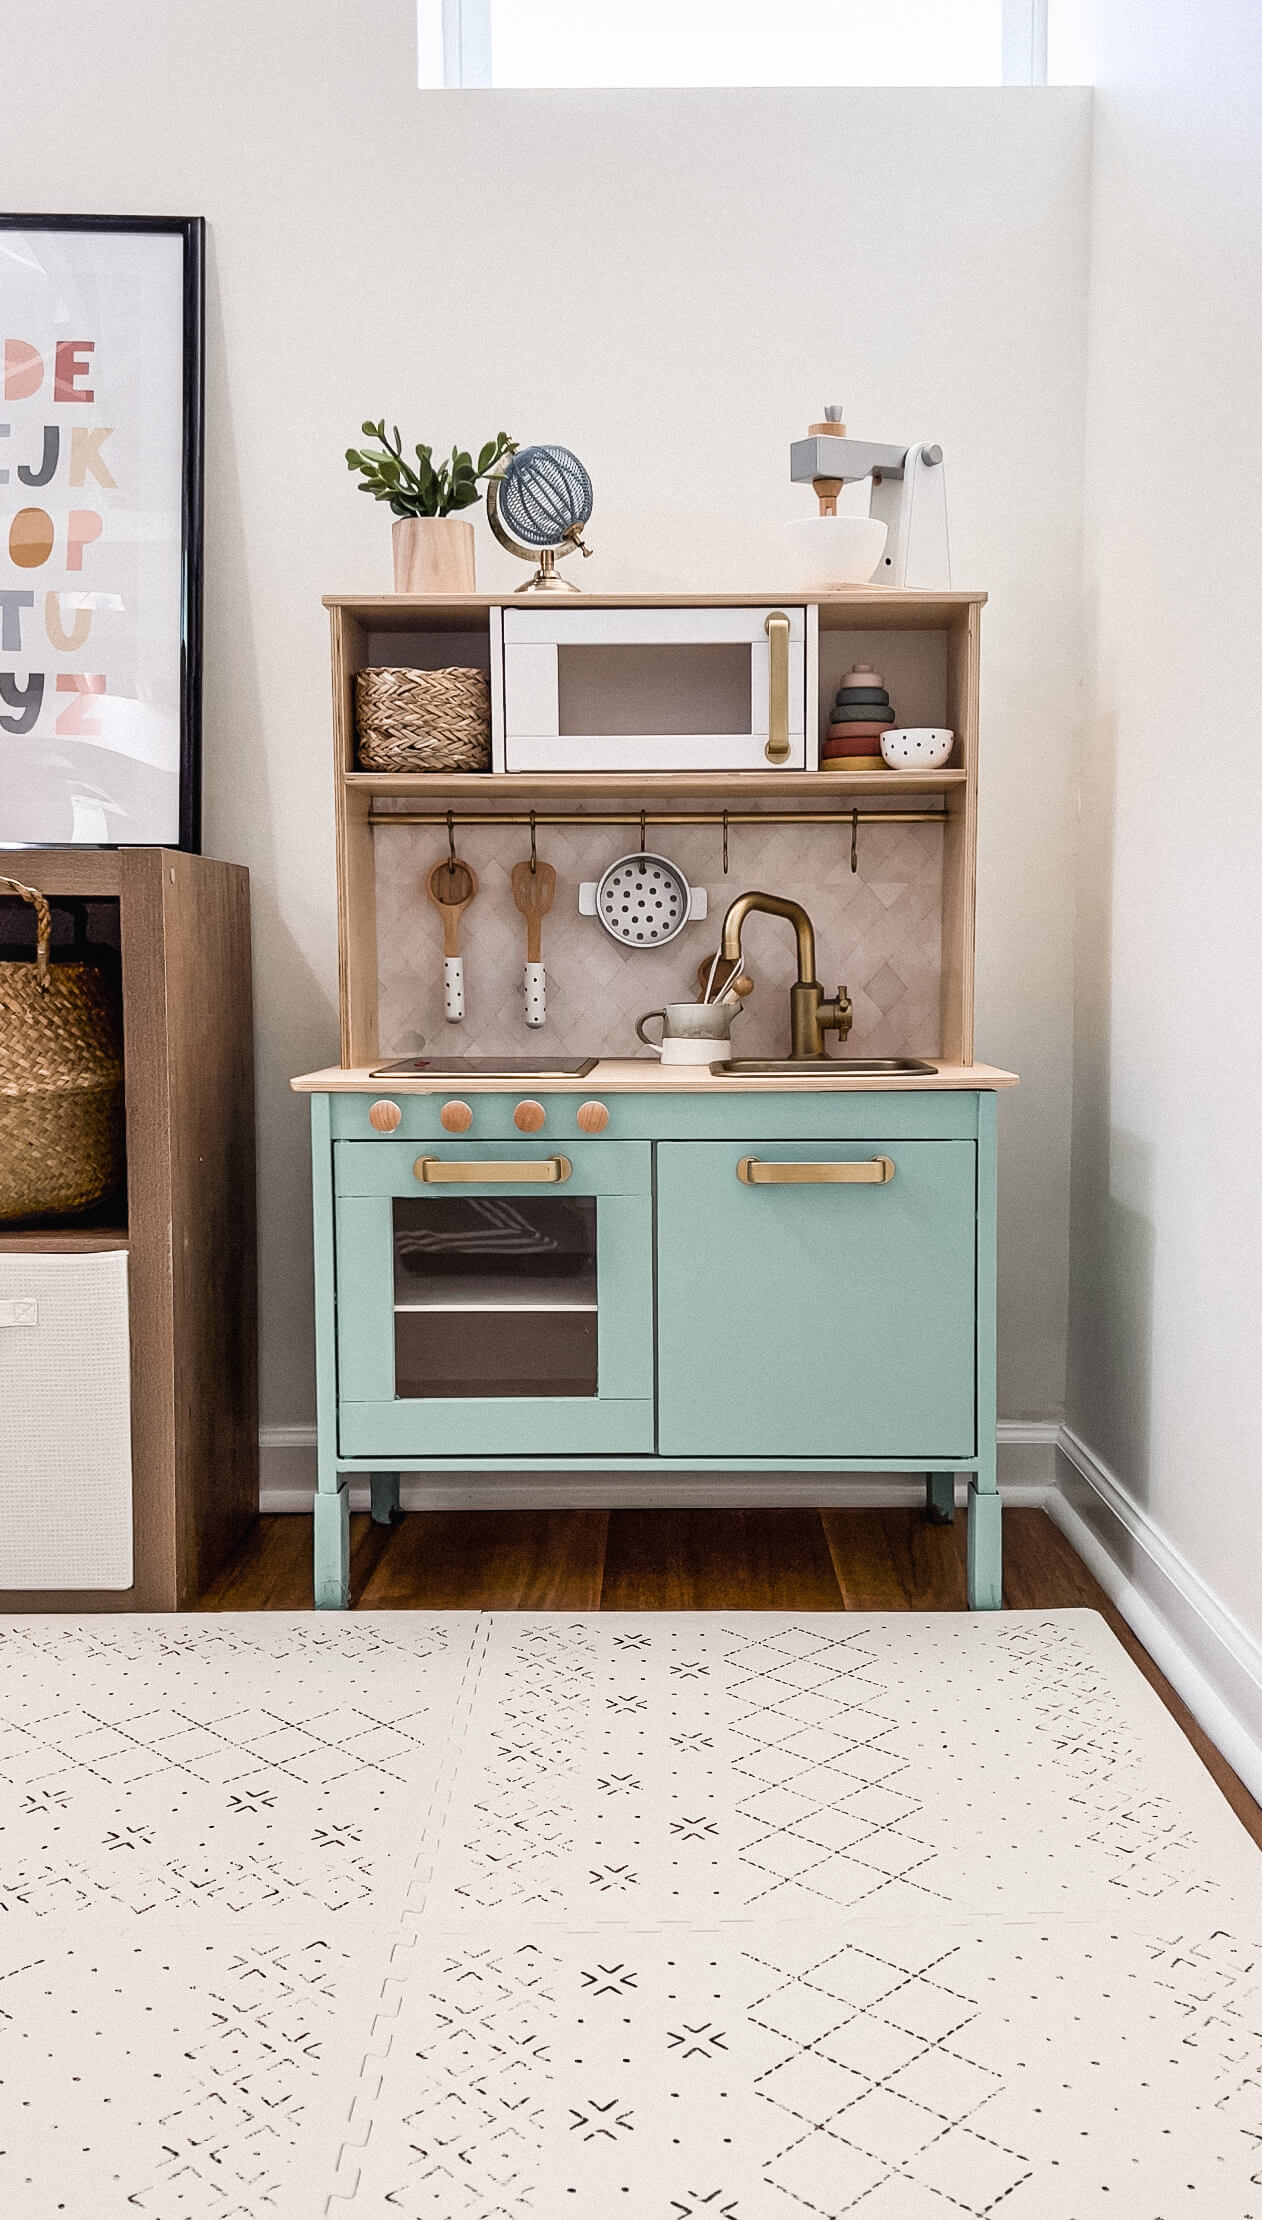
Customized/ DIY IKEA Play Kitchen for the Playroom
I’ve been working for what feels like forever on Saylor’s, and soon to be baby boy’s, playroom in our basement. There’s been just so many things holding up my progress (ahem, first trimester and daycare illnesses..). To say my creativity was dampened for a little while is an understatement!
But the weather is turning and I am finally feeling great, so now it’s full steam ahead with the playroom. And the next piece of that is Saylor’s Play Kitchen!

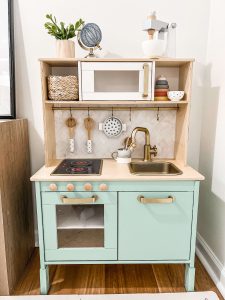
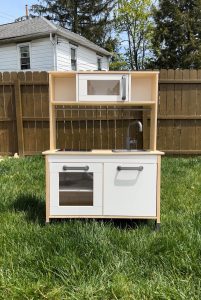
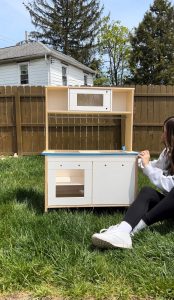
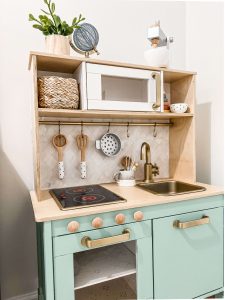
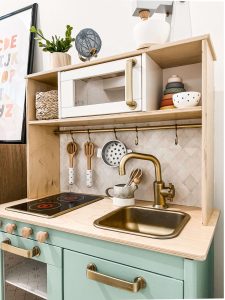
Saylor’s Nonnie got her this Play Kitchen from IKEA for Christmas. It is super cute and functional (stovetop even lights up!). But it does come rather plain looking in white / wood. I’ve seen so many blogs and Pinterest posts where people are taking their IKEA play kitchens to the next level by customizing them (paint, add-ons, etc.). I got SO inspired scrolling through ideas that I knew I wanted to put my own spin on it, and make something that fit our little Saylor and her playroom. I was also looking to add a bit more color to the room as it was.
This blog post is going to give a little step-by-step of the process, what I used and links to the accessories I got along with it!
G E T T H E L O O K :

1. P A I N T I N G
So to start, in hindsight I would not have put together the play kitchen first and then painted. I probably would have figured out where the pieces go together (because it is hard to discern that when you first open the box), then paint, THEN assemble it. But, I was so excited when we got it back in December that we just put it together.
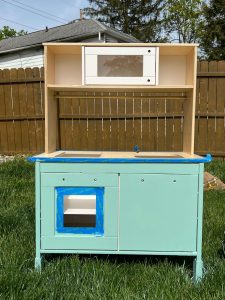
Anyway, I decided to work around it assembled so I unscrewed all of the “hardware” – the silver handles, towel bar/rings, stovetop, sink and faucet. I used a piece of cardboard and poked holes in it to stand up each handle upright. I knew for the stovetop I wanted to paint the silver edges but avoid the burner area so I used painters tape to cover the entire surface area besides the edges.
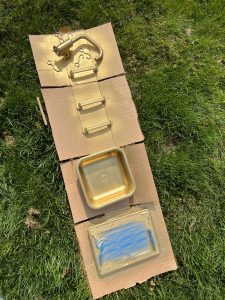
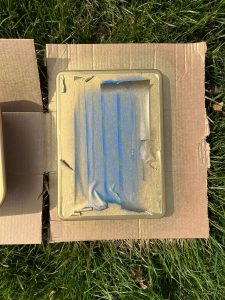
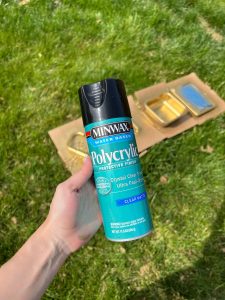
Then I used this gold spray paint to really cover all the pieces (2 coats). Once it dried, I used this top coat (Miniwax Polycrylic in clear) to prevent chipping – I had to go really light with each coat (I did about 3 coats) to avoid it creating a milky effect on the gold.

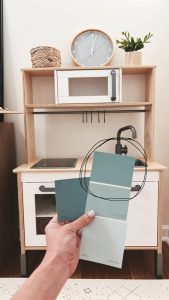
When it came to the kitchen itself I used painters tape to protect the countertop (wanted to keep that wood) and painted the entire bottom half, including the leg plastic covers. I also used painters tape around the glass of the oven door. Once I had everything taped up properly, I started painting. I decided on the color “Salted Marshes” by Sherwin Williams, a fun, poppy blue/green color that went along well with the blues in the wall mural on the other side of the playroom.
2. B A C K S P L A S H
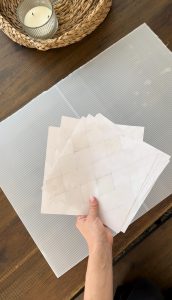
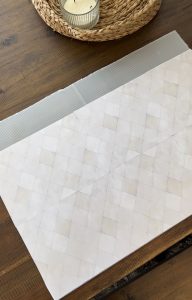
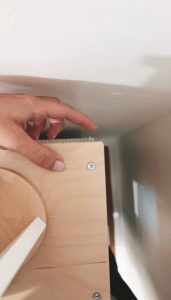
The play kitchen comes with no backing or backsplash, so I decided to create one of my own. I found this tile image online via Google Search and pasted into a Canva image and hit print. I printed about 8 copies of it in color and then aligned/ glued them with a light spray glue to the back of a plastic poster board from Michael’s that I cut down to size. Then I used small nails to nail them to the back of the play kitchen.
3. O V E N K N O B S
To make the oven seem more ‘authentic’, I added these wooden knobs ($0.99 from Amazon) to the front of it using a wood Gorilla glue. I am hoping that they stay on well! But definitely adds a cute touch and ties in with the wood of the rest of the kitchen.
4. T H E A C C E S S O R I E S
And finally what really makes the play kitchen come to life are all the accessories! I found the most adorable mixer and utensils/pots accessories (under $25 each!). Now I’m on the hunt for some play food. Linking the rest of the accessories you see used in the play kitchen below.
Now for the rest of the playroom, we have some hanging and decorating to do but we’re almost there! Leave your thoughts on the outcome of the play kitchen in comments!